I have slowly been piecing together some ideas for test machines. I like to think from the base system up to the vulnerabilities to gain an initial foothold. This process has been super helpful for me to understand the exploitation and enumeration process a bit more. One of my recent obsessions has been restricted shells and coming up with some interesting workarounds. One for causing pain on the tester hacking into the machine but two to find clever ways in and out of a low privilege user shells. Below are some of my favorite resources on the subject:
So as part of my OSCP labs I wanted to focus on a few machines with buffer overflows. So I decided to tackle brainpan. After downloading and uploading the .ova file I began a basic scan of my network with:
nmap -sP 192.168.0.*
Locating the VM on the network. I start the enumeration process with nmap and gobuster.
nmap -O -A -p- 192.168.0.168
Seems to be two ports open, one of which is an HTTP service and another unidentified service on port 9999. Let’s explore the HTTP web interface and run gobuster, but first I will attempt to identify port 9999 with telnet.
I attempted to login with the username root. I was given ACCESS DENIED. No luck I tried a string of AAAAAAA…s but no luck. So I decided to move on.
On the 10000 port We find an interesting image about safe and practical coding. Hmmmm… Leads me to believe maybe our little abyss port might have something to do with this. I moved on to running gobuster to enumerate some of the directories on this machine.
Quickly we see that there is a directory called bin. Let’s browser to this directory and see if we can find anything useful. Looks like there is an executable file.
I will download the executable to a windows machine and investigate it a bit further.
Now that I have the executable on my machine up and running I will need to scan it and see what operations are happening on the Windows machine from my Linux attacker machine.
After locating the IP address of the Windows machine and running the .exe file I have verified that this 9999 port or abyss has something to do with the brainpan.exe file. I will try to establish a connection below with our python proof of concept script and see if I can crash the program.
#!/usr/bin/python import socket import sys junk = "A" * 500 s = socket.socket(socket.AF_INET,socket.SOCK_STREAM) connet = s.connect((sys.argv[1], 9999)) s.recv(1024) s.send(junk)
We can see we have successfully attempted to connect with our junk A’s.
Now let’s see if we can increase the size of the junk buffer and cause a crash on the remote program. A buffer overflow is what we should be looking for in this program. We will need to do quite a few other things to catch a shell but let’s see what we can establish on this machine.
So I changed my proof of concept code form 500 A’s to 1000. We get a successful crash on the machine and we can now begin controlling EIP, finding a jump point, and establishing bad characters for our shellcode.
Crashing the Program
So we will start brainpan.exe and then attach immunity debugger.
Once we have done that we will attempt to crash the program again but instead of A’s we will use msg-pattern create to make a pattern we can easily use to identify the EIP registry.
Now I will run this script and investigate the amount of characters it will take to write over EIP. Using !mona in Immunity Debugger I will run this script below once I cause the crash:
!mona findmsp
We can see our EIP is at character number 524
Now we will re-write our code to include 524 A’s and then 4 B’s after to gain control of EIP.
We have now verified that we can gain control over EIP with 4 B’s in its place. Now all we need to do is find an unprotected module for our jump point in ESP, find bad characters in our shell code, and use msf-venom to build our reverse TCP connection.
Finding Modules / JMP ESP
We have located an unprotected module in brainpan.exe. Now we will need to use !mona to find a JMP ESP address. Running the command below in immunity:
!mona find -s “\xff\xe4” -m brainpan.exe
We find a find a JMP ESP instruction at memory address 311712F3. I will add a comment to our code and begin searching for bad characters for our shell code.
I am currently 2/3rds of the way through my OSCP labs. I have started going back through all the buffer overflow examples I have found that will help me attack the 25 point machine on the test. Currently I have worked through the FreeFloat, SyncBreeze, and VulnServer to help me along my journey. So I wanted to start documenting my BOF training on my blog. Both as a resource for others and a documentation for myself.
I started PenTesting in 09/10′ during college. I dedicated one of my one of my 3 month internships by going through the c0relan.be tutorials. Mostly on my own server at the school and on my dedicated VM WinXP machine at the time. These tutorials are a great resource though somewhat outdated they lay out the basics of exploit development and I highly encourage anyone interested in exDev to use them as an educational tool.
Fuzzing MiniShare
We first need to create our basic fuzzing program to help crash the Minishare Server and locate the offset of EIP.
I like to use the sys.argv value to help recreate the program at another point and input my own values. It gives me a bit more control and flexibility with the exDev process. You can slowly increment the amount of A’s pushed onto the server until it crashes. Once we have found the necessary amount of A’s to crash the program we can begin to control the EIP register.
Controlling EIP
Once we have been able to successfully crash the program we now need to control the EIP register and begin to build out our exploit a bit more. Using pattern create we can generate a series of chars that will help us understand the offset of the EIP register. We want to use the same amount of chars that initially crash the program.
msf-pattern_create -l 2000
Copy paste the pattern info into the proof of concept fuzzing program. I also create a new version of my exploits to better reference the evolution of the exploit at a later date.
We will then run the program, attach it to Immunity, and crash the application again using our new string of 2000 chars.
Once the program has crashed with our generated pattern go to the search bar and use !mona in Immunity and run the command:
!mona findmsp
We will then be able to locate the EIP offset and it will give us a unique dump of other potential registers of interest.
Our EIP register is offset at 1787 characters. So we now can gain control over EIP and can insert our 4 hexidecimal B’s to verify this control.
Below is our new exploit:
We will now use this simple exploit to see if we can gain control over EIP to then begin building out a place to put our shellcode. Open up the program again and attach Immunity. Be sure to press the play button to get the program out of the paused mode and running.
Run your exploit and you should crash the program and hit a breakpoint in the program. Be sure your 4 B’s are overwriting EIP like below.
Finding Bad Characters
Once we have gained control of EIP we will want to begin looking for any bad characters while creating our shellcode. So we will generate all hexidecimal characters from x01 to xff. Like below:
Placing this into our skeleton exploit after the A’s. Run the program again and attach Immunity. Run the exploit again observe the crash and Follow the Dump of ESP to locate any bad characters.
To start off we have xOD as our first bad character. We will take out xOD and run the exploit again. And observe any other bad char in the shellcode.
Be sure to make a comment in your skeleton code for future reference. This is just a good practice overall so if you continue with exDev it will be easier for other to read your code in the future.
Run the program again. attach Immunity, and run your skeleton exploit.
We can see that we do not get any other bad characters. So now we will need to find a register to jump to so we can run our shellcode. Below is our set of bad characters:
Finding JMP ESP & Generating Shellcode
When we crash MiniShare we want the contents of ESP to be executed by EIP. ESP will be the beginning of our shellcode that will want to execute to gain access to the Windows 7 machine. This can be done by executing a JMP ESP instruction. We will the program and Immunity using !mona to find our JMP ESP address.
We will go to our right click drop down module:
search > all modules
JMP ESP
We will use the USER32.ddl address of JMP ESP:
764b4e5b
Then we will generate our payload using msfvenom
msfvenom -p windows/shell_bind_tcp -a x86 -b '\x00\x0d' -f c
Take your generated shellcode and place it into your working exploit after the nops.
A note on nops
NOPS:
No operations are an important part of shellcode, imagine trying to point to a single address, that holds our shellcode,
when the possibility of pointing to the correct address is slim, Nops make it easier, because they do nothing, they just
go down until the next instruction, so imagine your shellcode in the environment, and we point to the wrong address
which just so happens to have our NOPS:
0xbffffca8: NOP
0xbffffcac: NOP
0xbffffcb2: SHELLCODE
Log in as your normal user in the Juice Shop application and submit a review to one of the products.
Once the product review has been submitted click the edit review button that pops up as shown below.
Make sure your Burpsuite proxy is on and running to capture the PATCH request for our review edit. But first what is a PATCH request.
A PATCH request is a HTTP method to update partial resources on a web application. When we consider the Juice Shop and many of its intentionally vulnerable API implementations we can use the ID parameter from one users review and place it inside the other and PATCH the request and intentionally forge information displayed on the web application.
So we have captured the request and now send it to repeater in Burpsuite seen below.
Examining the id parameter we can assume that this token be repeated and submitted as though it is another user. Firstly we need to locate the id token of bender to be able to spoof and change his comments. So we will capture the thumbs up on his review and then use his id token below to change his comment on the review section. Changing the id parameter of the PATCH request captured by Burpsuite from yours to Benders id token.
Press [ Send ] and view the FireFox browser for the new comment you sent through the PATCH request Burpsuite and Juice Shop API.
Today I would like to go over a couple examples of the most basic cross-site scripting attacks. Cross-site scripting attacks or XSS for short have been on the rise over the last few years. XSS is a web application based vulnerability that affects the user or client of a server or application. Typically it can be used as a leverage point to steal cookies and user authentication. Seen initially as a very primitive attack that had affected the majority of the internet it has now come to public knowledge as a more severe attack wherein a malicious actor can wiggle their way deeper into a server or system.
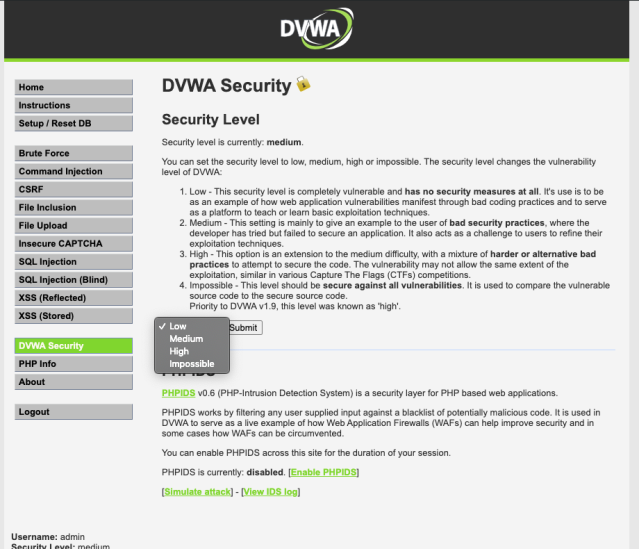
Let’s get our hands a bit dirty. You will want to spin up a virtual machine with DVWA in any of your favorite VM environments or set up Docker on your local machine and import the newest version of DWVA via the terminal. I will not go over the steps here to do that, maybe at a later point, I will give a quick tutorial on how but for now let’s assume you know that part of the process. Once you have DVWA installed and you have navigated to your localhost:port for the install on your browser we will put in our username and password and begin the exploitation process. Be sure to set the security level to low.
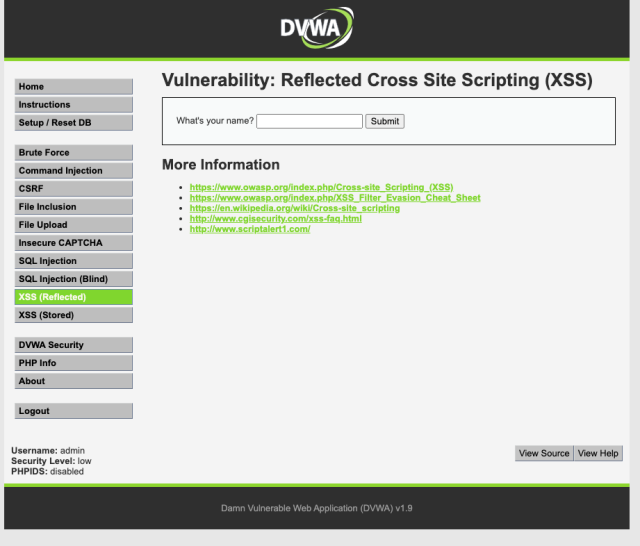
Once you have found the proper location of the DVWA security level form we will browse over to our XSS (Reflected) page to begin our exploitation process.
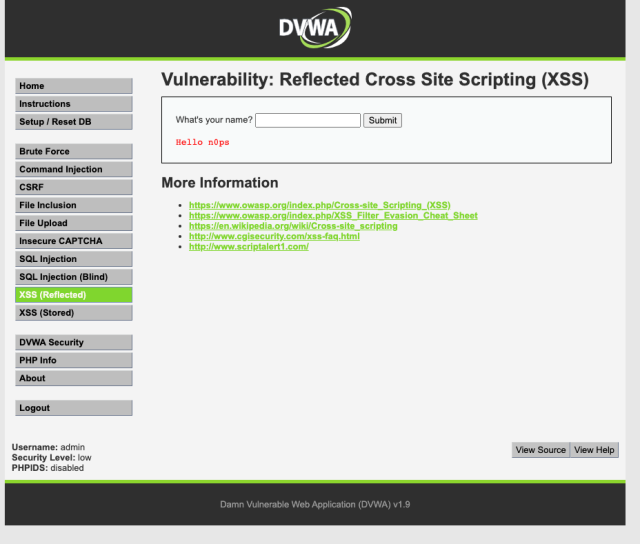
The first thing I would like you to do is place your name into the form field and hit enter. Pay attention to two things. One look at the URL above and two the location of your name on the screen.
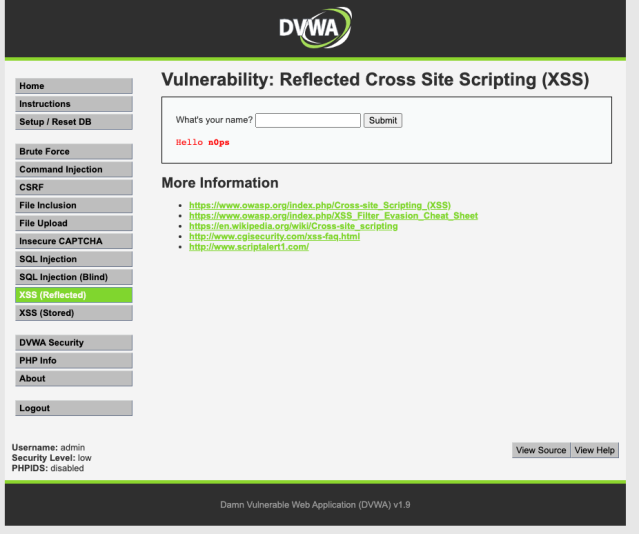
Both of these are going to be paramount to finding a successful attack. What we are looking for here is user data that can be input into a form field that will acknowledge whatever we feed into it. Now what we are going to do is manipulate the data below to find a possible point of entry for our XSS attack. Write your name again and give it a bit of HTML text styling.
We see that as a user we can manipulate some data we place into a submit form. So lets now do our “primitive attack” on the web application. Type in the tag below and you should get a window to pop-up notifying the attacker of a flaw in the application.
We always want to refer to the URL and the submit form. This is where we will be able to glean deeper information into the program’s function. Stay tuned for the next post on harden security measures and other ways to bypass the security of the application for finding reflected XSS.
Further reading and considerations:
Take some time to read about HTML forms, HTML and Javascript basics. Read about tags: script, iframe, img, svg. Lastly read about Javascript and HTML filters. All of this information will be paramount to you understanding how to find and locate XSS attacks in the wild.
I have slowly been working through a few exploits with vulnserver.exe. An awesome multithread TCP server which was written by Stephan Bradshaw of the Grey Corner blog. If you follow the link to the GitHub you can see a few awesome tutorials.
I have mostly started playing with this Windows-based server to get a more robust understanding of exploit dev since working through the C0relan.be exercises. Which I would also highly recommend but are a little dated. Though offer helpful directions in getting your feet a bit wet with exploit dev.
Other tutorials I would recommend and try out: Sam Class Sh3llC0d3r series InfoSec Resources – Part 1
I will slowly be uploading all my code to GitHub so if you want to try it for yourself and see how it works on your machine. I will be sure to comment on all the code detailing the OS version and type.
Note If you plan on running Vulnserver.exe and exploiting the program will need a few prerequisites. To get yourself started. I suggest learning and understanding Python somewhat thoroughly before diving in. Do not just copy-paste the code and expect it to work. Also be proficient in the uses of Immunity Debugger and Mona.py both are powerful tools for understanding what is happening in real-time with your code and program crashes.